Hi Guys,
Today we’re going to look at shifting from first position up to the most basic natural harmonics on your violin. This involves a number of important techniques and is something that will also help with your intonation awareness. I’m going to work through exercise PB from the AMEB violin technical workbook; it’s called ‘Trampoline’ and gives you lots of opportunity to practice shifting up to harmonics and back down to an accurate first position.
For those of you who also play the piano, you’ll know that playing an A can mean a number of different keys on your piano and that no A is easier or harder to play than the next. On your violin however, playing an A can be done in many different way; you know that each A should sound the same as the one before it, but achieving this can be easier said than done!
What Are Harmonic Notes?
Technically speaking, harmonics are overtones of the string and when you play them, you will hear a very different sound to what you produce when your fingers are placed firmly on the string.
Take a look at the music below; you’ll see that on the bottom, the notes are written normally. Then there are diamond shaped notes written above, indicating that they are to be played as harmonics. These are called ‘artificial’ harmonics and are played by firmly pressing the first finger down on the note which is coloured black. We’re not going to be playing artificial harmonics today.
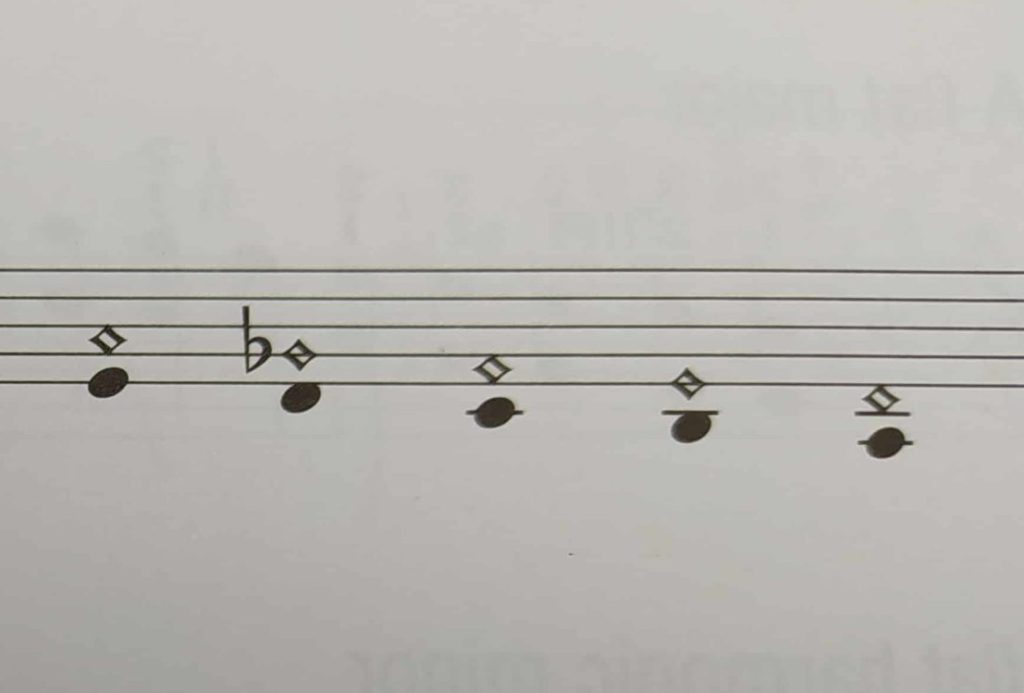
The bottom line of music below also shows harmonics but this time there is no black, normal looking note below the little empty diamond head. These are the ‘natural’ harmonics and you can see the sound that they produce on the top line.
We’re going to be focusing on the most basic natural harmonics today. To play natural harmonics, you do not put your first finger down, but rather position your finger (usually the third or fourth finger at this stage) very lightly in exactly the right spot.
Before You Start:
As always, correct technique is an absolute must. If your violin is slipping of your shoulder or if you’re ‘grabbing’ the neck of your violin in order to support it, you need to address this BEFORE attempting these exercises. Check out my post on holding a violin and take a look at some good shoulder rests before you go any further.
Also, be sure that your bow hold is correct and that you are able to use the middle section of your bow smoothly and without movement of your upper arm. If you’re struggling with your bow, you should practice some of the Twinkle Variations which you can find here.
Let's Play Some Harmonics!
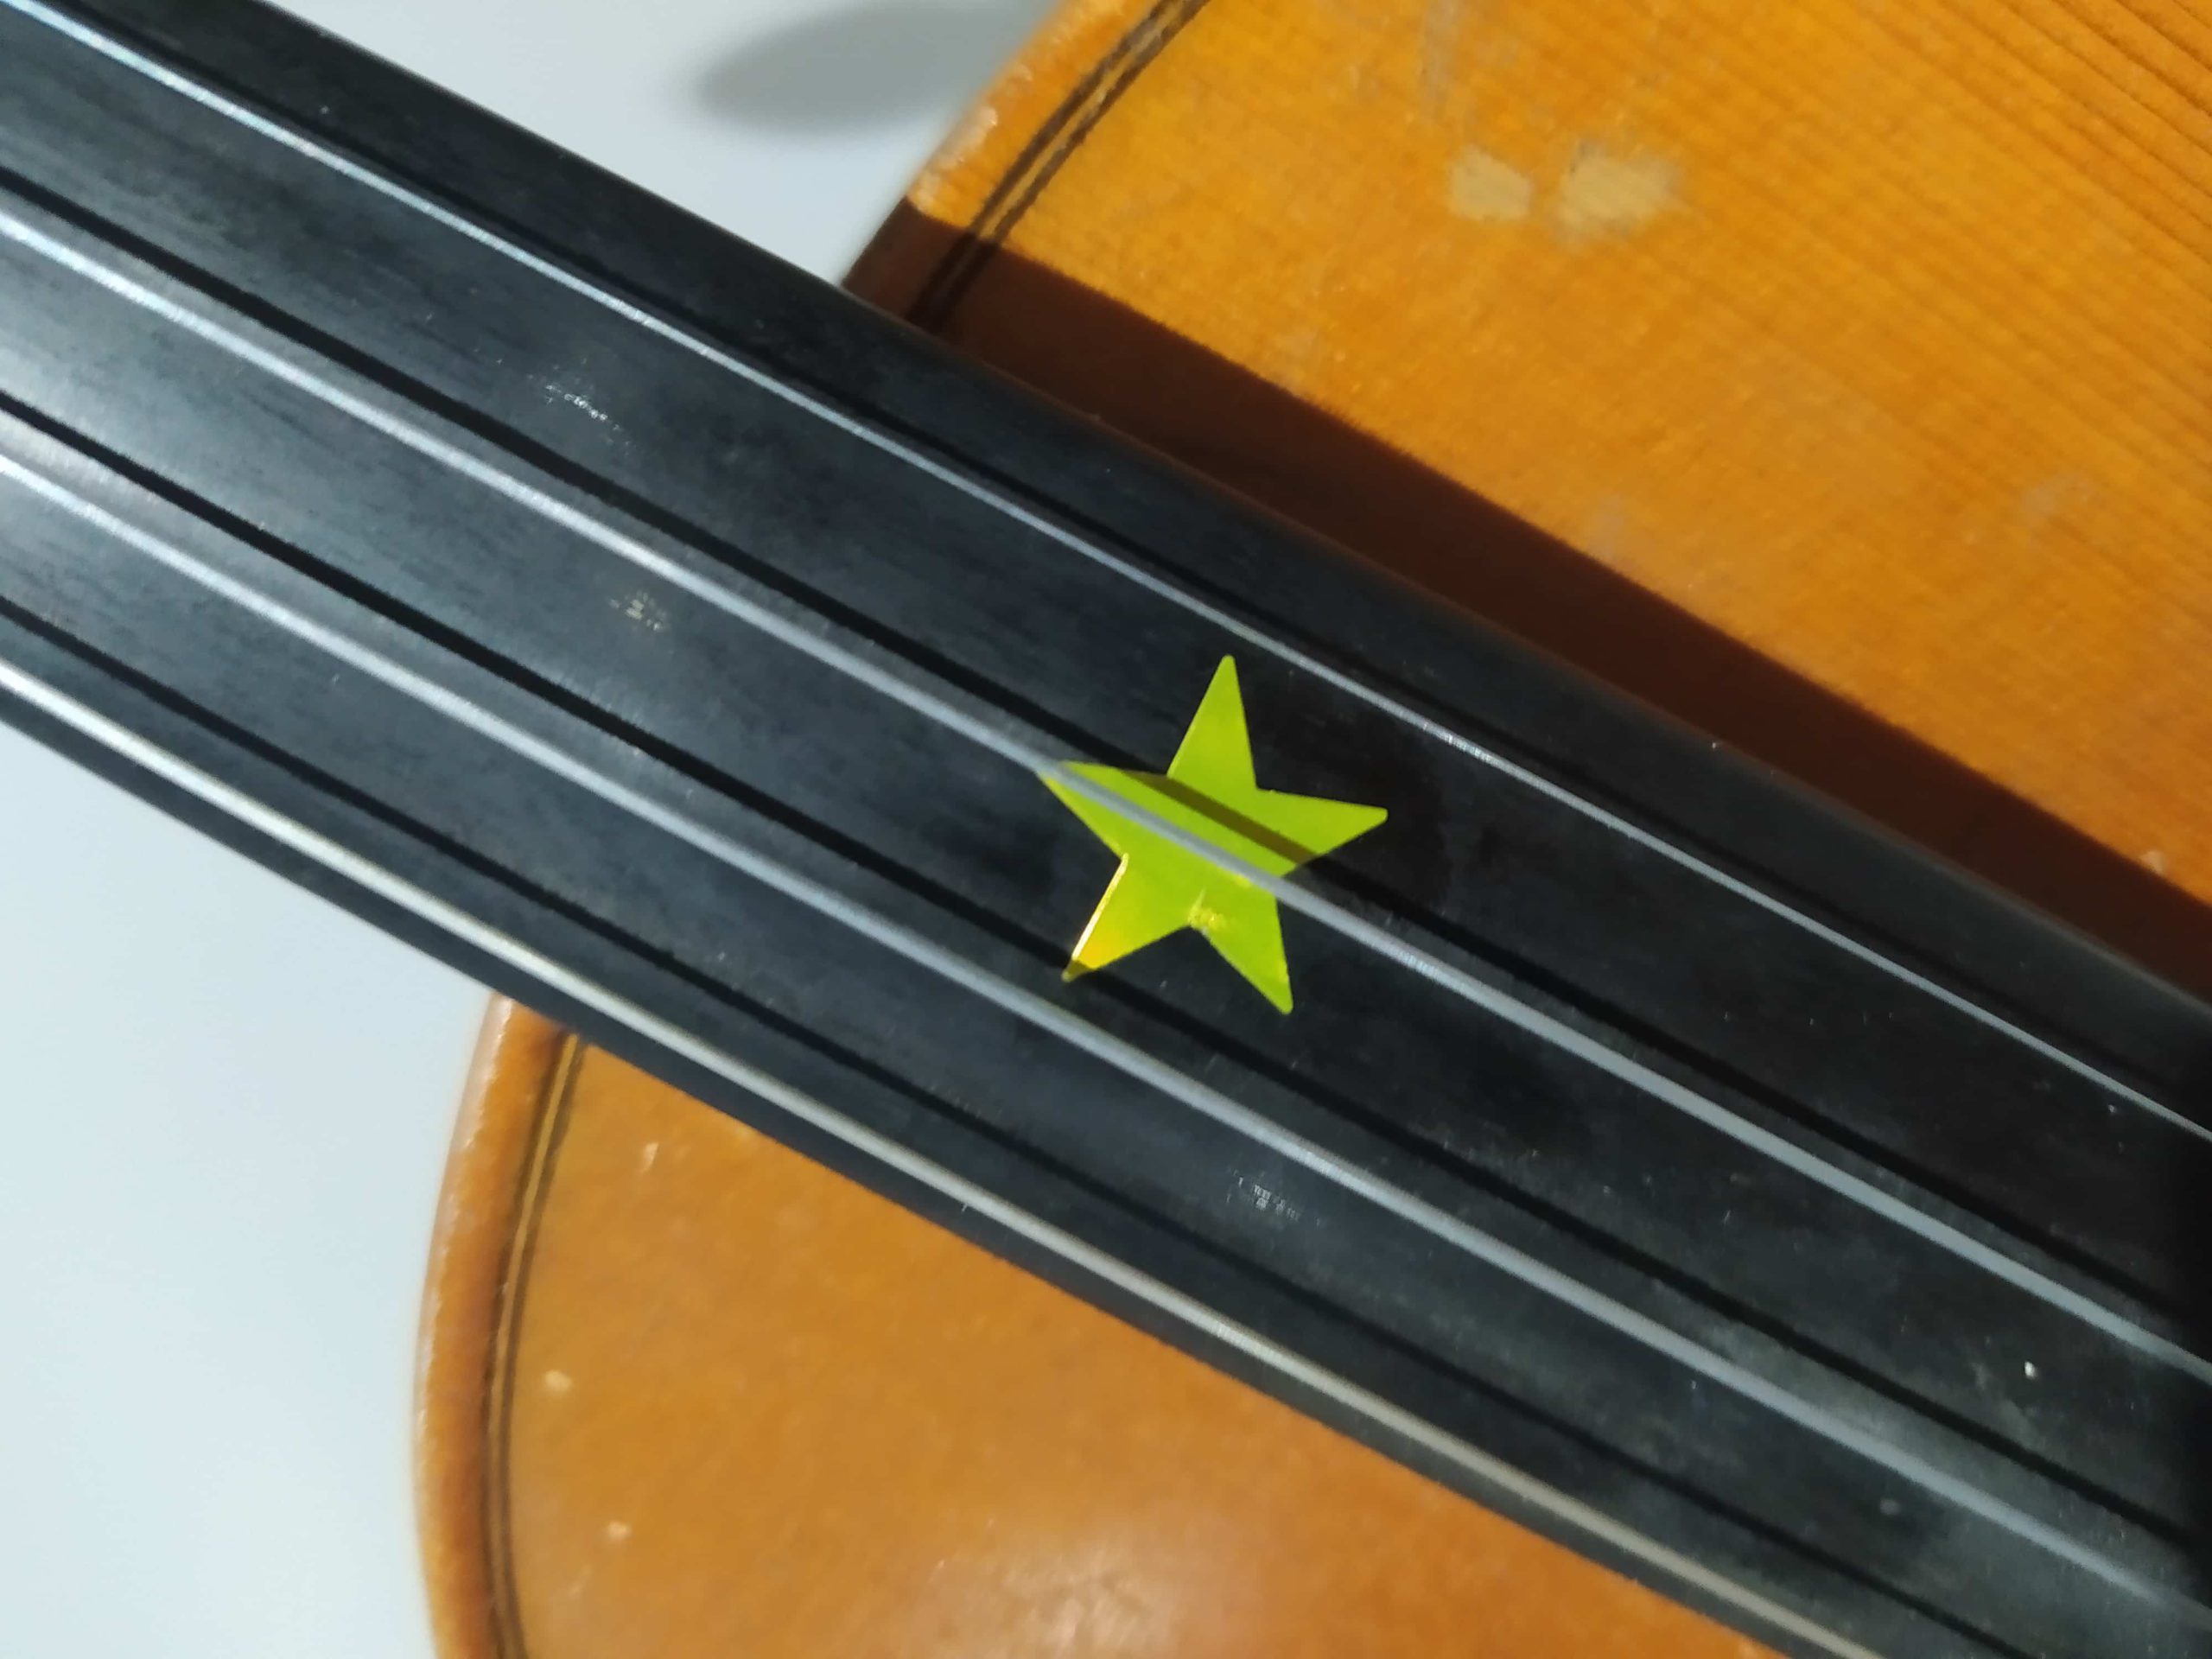
The harmonic we want to play is located in the middle of your string. For most violins, this will be a little higher than where the neck of your violin meets the wooden body. Ensuring that your whole hand and thumb are positioned like I’ve shown in the picture below, test this harmonic out.
Place the finger very lightly, like a feather on the string. If you feel the vibration of the string on your finger as you play, you are not in exactly the right spot. Move your finger around until you feel nothing as you move your bow across the string.
Once you’ve located your harmonic position, play some short watermelons or pineapples on each string. Stop and think as you move to each new string and ensure that you’re not feeling the vibration under your finger.
As shown in the video, you could try playing the rhythm of exercise PB using only the harmonic on each string.
Let's Shift!
Although we’re focusing on natural harmonics today, this exercise also requires technically accurate shifting from the high harmonic position down to first position and back up again.
Choosing your best harmonic string and starting in first position, play A, A1, A2 A3, A4 and then slide your whole hand up to the natural harmonic that we played in the previous exercise.
You could put a sticker on the fingerboard where your harmonic sounds so that you get used to the shift.
As you slide up, ensure that your left hand and thumb are travelling up the neck of your violin. It is SO important that you take care not to leave your thumb behind.
Take note that once you get to your harmonic you don’t feel the vibration under your finger; adjust your finger as necessary to eliminate this vibration.
Move back down and repeat the exercise until you are confident enough to try on other strings. As you move down, ensure that your left hand and thumb also travel down the neck of your violin.

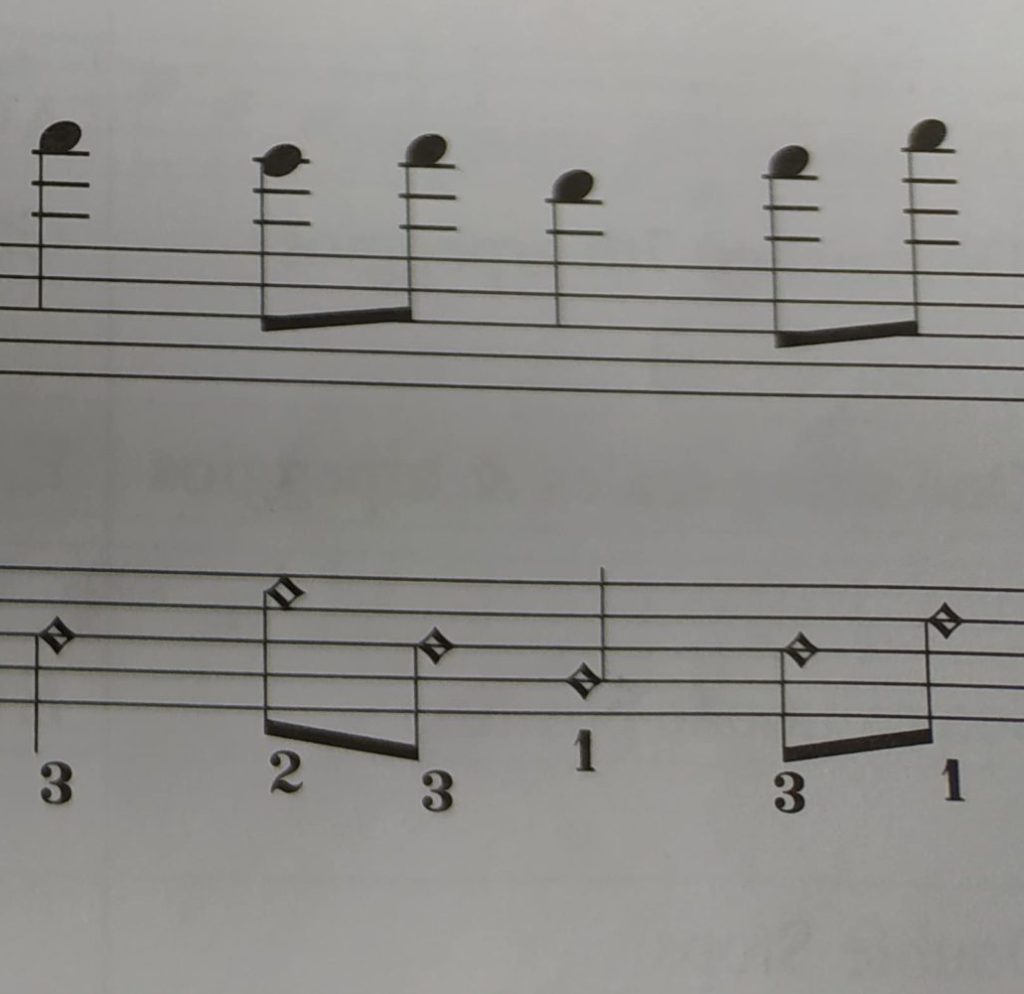
Now For Exercise PB - Trampoline:
Trampoline combines the two shorter exercises we have worked through already and also requires you to carefully listen for accurate intonation.
If you look carefully, the first ten notes played are all As. We have 4 semiquaver high As played as third fingers on the E string. We then play two ‘low’ As on the open A string.
Now, ensuring that your whole left hand and thumb move up the neck of your violin, head up to the natural A harmonic that we worked on earlier before moving back down to first position to play 2 open A quavers.
You should practice these first ten notes a number of times and over the course of a week or so to ensure that your shifts and harmonics are confident and that your As all ‘match’ one another.
You can then do the same thing using the A and D strings and finally the D and G strings.
The last part of the exercise is purely for decorative purposes and gives a nice flourish to the end of the exercise. Ensure that as you descend on the G string in first position, your fingers are framed correctly; your second finger should be up right next to the third finger. Many students do not do this well, and instead place their second finger either in the low second place or not close enough to the third finger.

Congratulations!
You’ve now completed Exercise PB – Trampoline. Whether you’re preparing for your preliminary exam or if you were just looking for something to help you play better harmonics, you’re now on the right track to some great playing. Through doing these exercises, you’ve addressed some essential beginner shifting technique and found the most basic natural harmonic notes on your violin.
There are so many exercises for harmonics and shifting and I will certainly cover these in future posts and videos. If you’re wanting some more work with shifting at this level, take a look at my post which discusses exercise PA.
If you have any questions about violin harmonics or anything else violin related, don’t hesitate to leave a comment in the comment section below
Marketa 😉
(founder of myviolinbff.com)

Hi Marketa,
You are a great teacher with expressive instructions.
I can play the piano (my mom was a piano teacher) and guitar. I’ve always loved the violin but never picked it up.
Reading your post makes me wish I did. But can you teach an old dog new tricks, lol?
Maybe I can convince one of my grandchildren to try. My son-in-low plays a lot of guitar so they have a lot of music playing in the house.
I’m sure many of your readers are enjoying your lessons!
Cheers,
Suzanne
Hi Suzanne and thanks for your response,
You can teach an old dog new tricks but it’s a lot harder! If you do want to get started, let me know and I’ll be happy to give you some pointers. Thanks for your kind words and best of luck with the grandchildren 🙂
Hi Marketa,
Thanks for the post and most specifically the video. Wonderful sounds and amazing how you make it look so easy.
Our daughter has been playing the guitar for a few years now but decided she wanted a new challenge, so just after Christmas she chose to learn the violin. Needless to say the screeching noises coming from her bedroom, for the first couple of weeks, were not quite what we were used to, but she is getting better all the while. I’ll be sure to point her to your site when she gets back from school. I’m confident that it will be useful for her.
Hi Lawrence and thanks so much for your feedback.
Violin is pretty horrific to listen to when students first start, but give it time and she’ll be playing beautifully.
Do let me know if you have any specific things you’d like me to cover in the future
Best wishes 🙂
Thank you Marketa for that informative lesson, you are a lovely teacher, very easy to listen to and follow along. The video was beautifully made! Thank you for your post.
Hi Stephanie!
Thanks so much for your feedback and I’m so gad you found this useful 🙂
Wow Great video for a beginner.
I never knew that there were watermelons and pineapples when playing a violin. Your video was very well put for me to get started.
From what I gather in order to be good at playing the violin you need to have very light and gentle fingers right?
Hi there and thanks for your interest in my article,
I’m so glad that you’ve found the video useful. When using your left fingers to play different notes, you generally need to press quite firmly, but for harmonics, it’s just a very light touch. Make sure you’re confident with your normal finger and left hand placement before you venture into harmonics 🙂
What a great and insightful article. I appreciate how you include a video in the post, it really brings the post to life and makes it more relatable. Sometimes it can be hard to learn by merely reading, I personally am a visual learner.
Keep up the great work.
Sharon
Thanks Sharon,
I’m gad you’ve found this useful 🙂
Hi Marketa. Thank you for your session. With the video teaching and details explanation it is so much easy to learn and understanding especially for a beginner learner…:-)
Thanks for your feedback, Janet,
I’m glad that you’ve found this useful and easy to follow 🙂
I have had an interest in playing musical instruments my entire life, I learned to play the guitar before I reached my teenage years. I have also learned online how to play the harmonica, but I have never thought about learning to play the violin until reading your article.
I am over 60 now with some arthritis in my hands and fingers, but I still can play my guitar so do you think I could learn to play the violin without any problems due to my arthritis in my hands and fingers
Jeff
Hi Jeff,
I think it might be difficult to play comfortably. All I know about arthritis is that it’s an autoimmune disease, so I’m not entirely sure about how it feels or how it impacts your ability to use your fingers and hands. I’d speak to your doctor about this and see what they say. Learning to play the violin, especially as an adult requires real care and precision with the hands and fingers.
Best of luck and thanks for your interest in my article! 🙂