Hi Guys,
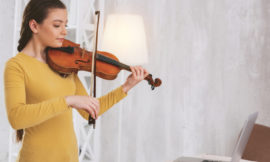
Today we’re going to be looking at the very specific area of our technical development known as left hand vioiln plucking. Although you won’t see too many left hand plucks in your pieces, the actual technique involved is something that can strengthen your left fingers and also be used to practice moving your hand up and down the neck of your violin.
We’re going to be using the fourth finger for our plucks and working though exercise PA from the current AMEB technical workbook to demonstrate the skills necessary to create a good quality plucking sound with your left hand.
If you haven’t already done so, you should check out the video below as it shows you how to play exercise PA from start to finish.
The Skills We'll Be Covering:
To produce the sound required for this exercise, we’d be far better off to put down the bow and pluck with the right hand. However, the point of the exercise is not to create a plucking sound, but rather to focus on techniques that will lead to changing position later on.
So, although we want to make a nice sound, our focus for this exercise is more on the pathway of the left thumb up and down the neck of the violin and the swing of the left arm as we move from the lower to higher position.
Before You Start:
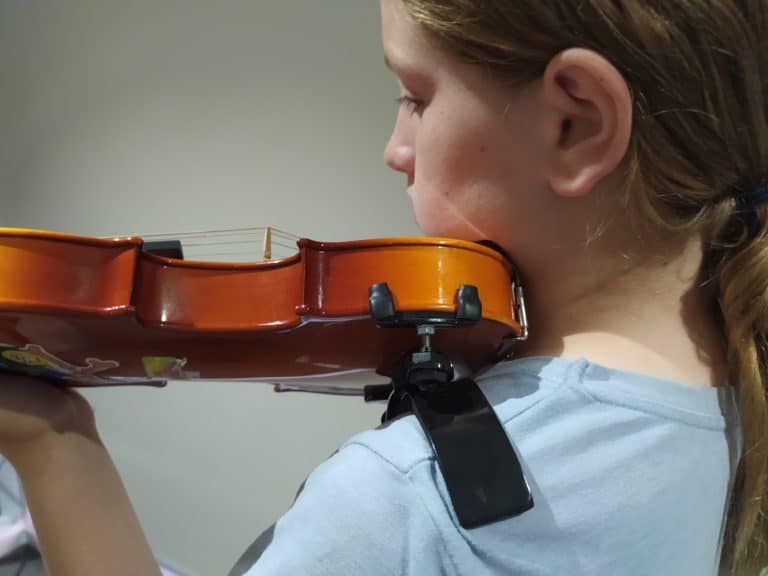
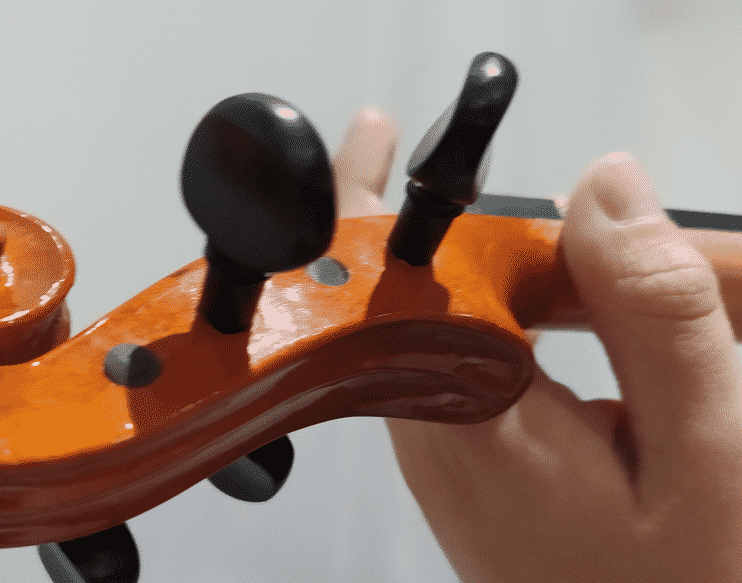
It’s absolutely imperative that your posture is correct and that your violin is positioned comfortably up and to the side. Stand in front of a mirror and hold your violin as you usually would. Gradually take your left hand away and place it by your side. If your violin starts slipping or you have to tense up your shoulder or neck to keep it in place, you’re not ready for left hand violin plucking; take some time to review how you’re holding your violin here.
Your shoulder rest may also be letting you down. I always recommend the Bonmusica violn shoulder rest to students who are having trouble keeping their violin in the correct position. You can read about it or get one of your own here.
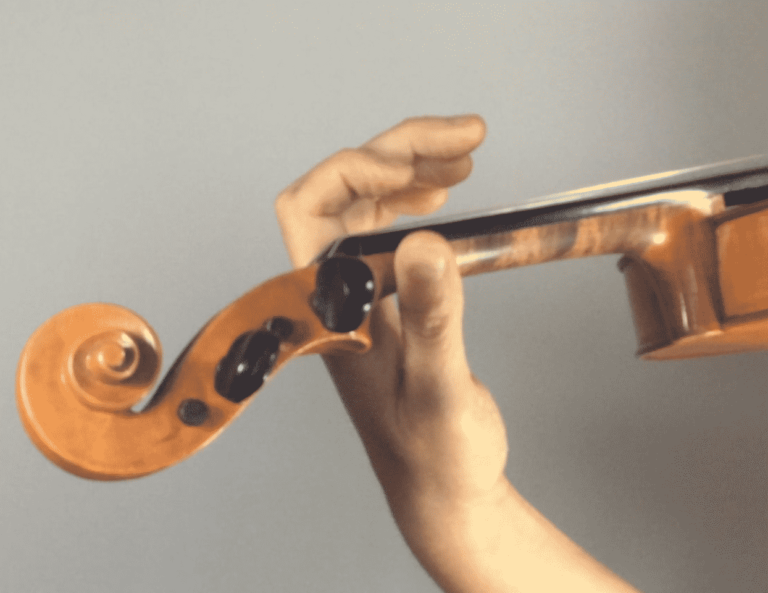
Once you’re confident with your violin position and posture, turn your attention to the left hand. Can the mouse get through the mousehole? Is the cheese able to sit on the shelf without being squashed or falling off? If you’re not sure what I’m talking about, check out your left finger placement and overall left hand technique here.
Once you’re happy with all this, you’re ready to start working on your left hand violin plucking!
Step 1 - Plucking In First Position:
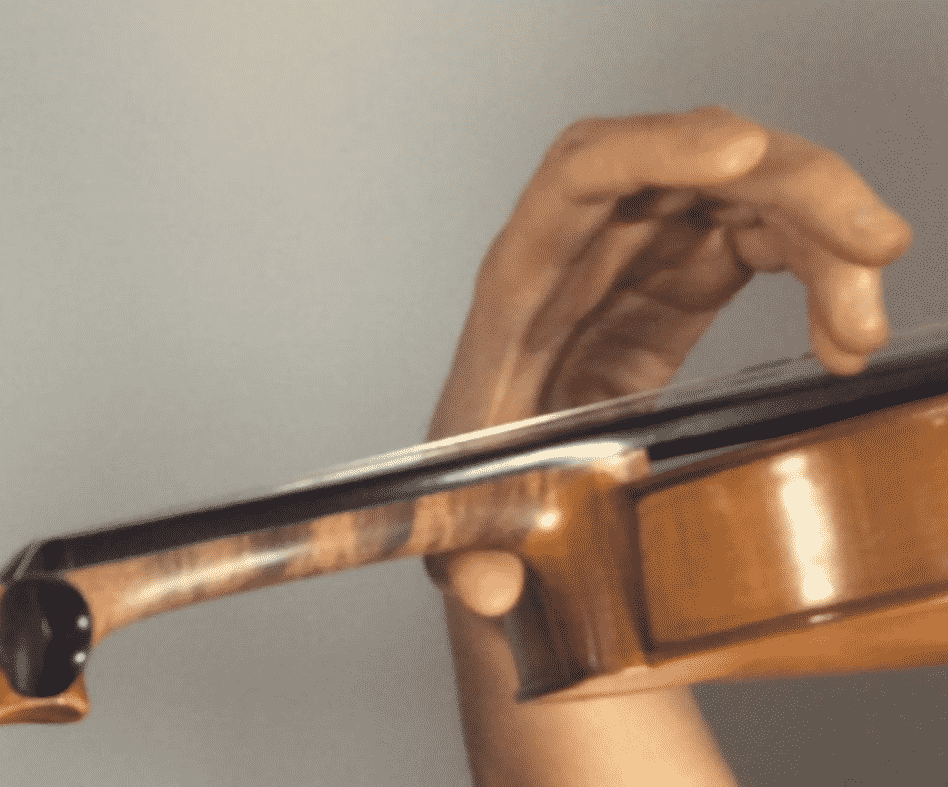
Let’s start by plucking in first position. We’re going to use the E and A strings here. Ensuring that your left hand is relaxed and the mouse hole is maintained, use whichever finger feels most comfortable to pluck 4 E string notes. Now try the same thing on the A string.
A common error is to tense up your left hand here. As you pluck each note, ensure that you focus on remaining loose and relaxed.
Once you’re confident with your most comfortable finger, try plucking with the other fingers; do four of each. Ensure that your thumb remains in it’s spot near the first finger and that the finger you’re plucking with is pulling the string at approximately the same place it would go if you were playing notes with the bow. So for example, your fourth finger on the A string should be plucking where it would sit to make the note E natural.
Once you’re confident with your left hand violin plucking technique, turn your attention to the quality of your sound. Notice that the sound we produce is not important until we have mastered the technique. Don’t pull your strings too hard but ensure that the sound rings clearly and that you’re plucking just one string at a time.
Step 2 - Plucking Up High:
Once you’re confident with plucking in first position, you want to move up the fingerboard to pluck on the G and D strings. You’ll see on the video that as I move up into the high position, my thumb travels up and around with my hand. Also notice how the left elbow and arm comes up and under the violin.
Take a moment to get into this ‘up high’ position. Your thumb should be ‘facing’ the roof and your hand should be positioned over the strings.
Try plucking four G string notes and follow this with four D string notes. Again try this will all fingers and aim for a clear, ringing sound.
Playing The Exercise:
It’s now time to work through PA – the AMEB left arm swings exercise. Note that although I teach students to move in and out of first position, this is not required; your teacher might have you remaining in the same position for the entire exercise. Moving position does mean that PA doubles up as a shifting preparation exercise though, so I’d suggest following the video exactly as I have shown.
We’re going to be using the fourth finger for the entire exercise and you’ll note that with practice, your fourth finger strengthens and can be used more effectively, not just for plucking but throughout your general playing.
The rests in this exercise are important and you want to use the time they provide to shift carefully and correctly up and down the neck of your violin. If you need more time to ensure good technique, by all means take it. The speed and flow of the exercise will come with time.
At the end of the exercise are two chords; be especially careful not to pull your strings too hard here. Not only will it make a horrible sound but you could damage your strings. Just gently sweep your pinky finger across the four strings, ensuring that your elbow swings as you go. The sound might be quite faint in the beginning but this will improve as your fourth finger strengthens and your technique becomes more confident.
Don't Drop Your Violin:
AMEB suggests that you use your right hand to stailise your violin during this exercise. This is a great idea as I’ve had quite a few students throw their violin on the floor while playing this exercise. Just hold onto the body of your violin with the right hand as you’re playing and you’ll be sure to keep it up.
This also makes it easier to move your left hand and arm correctly, so you can focus on making the exercise strong and confident.
Congratulations:
If you’ve made it this far, you’re on the way to mastering left hand violin plucking. Be sure to work through the video and read through this post regularly; good technique is not going to happen in one go and you’ll likely find something new to focus on each time.
Exercise PA is a really good way to strengthen your fourth finger and get started with shifting into different positions so even if you’re not following the AMEB syllabus or working towards AMEB exams, you’ll definitely benefit from practicing this exercise.
I hope you’ve found this post useful and please remember that if you have any questions about left hand violin plucking or anything else violin related, leave a comment in the comment section below and I’ll get back to you as soon as I can
Best of luck with your left hand plucking!
Marketa 😉
Founder of myviolinbff.com


I’m really inspired to get my old violin out having come to this article for my son. Thanks
Hi Angee,
that’s great news! do let me know how you go 🙂
I love your website. You give great details on the violin. As a vioilin lover but late starter, I can gain great insight from your knowledge. Also, the video was a great help!
Thanks so much for sharing!
Hi John and thanks for your comment
Congratulations on starting to play the violin as a late beginner! It’s a difficult instrument to master for sure
Hi! I have always thought violin sounds amazing and have only just started learnning. I really liked the information displayed here. You did a fantastic job of breaking things down and are very easy to follow. Now I have a great understanding of how to start. Awesome article! Thanks again
Hi Austin,
It’s so nice to hear that you’ve started learning violin having enjoyed the sound for so long. It’s definitely difficult to get started but once you have the basic technique down, you’ll fly forward. Best of luck with it and do let me know if you have any particular technique or exercises you’d like covered.
I love your website and how much value you give to your audience. I will recommend your site to everyone I know who play violin. Always wanted to learn it as little, but I chose guitar instead so can’t halp my doughter very much at all. this is very helpful for me to give her more advice.
Hi Hilde and thanks for your comment. It’s so difficult as a parent to help our children with something that we do not know so well ourselves. Even just knowing guitar, or any instrument is good for you to help your daughter. You will find that she will love to play along with you on the guitar as well.
Best wishes
marketa
I don’t understand why you have to use the fourth finger. The third is much easier. I think the third finger is more better.
Hi Jo,
Thanks for your suggestion but actually, this exercise is used to strengthen the fourth finger. It’s not a good idea to use the third finger here; the music even says 4. Keep practicing and your fourth finger will get stronger.
Hi Marketa,
I quite enjoyed your tutorial. While I don’t play violin (my daughter does) I still found your instructions easy to understand and I could visualize following along with the exercise. The video really adds to whole experience so a we could see and hear how the exercise should be performed. Great job.
Hi Richard and thanks for your feedback. I hope that your daughter will continue to use my videos and posts – I’m so glad that you found it all easy to understand!
Hi Marketa,
Thank you for the article, is really well done. I also love that you included a video.
I would like to ask you if you think that our breathing can influence our executions, especially when studying a new technique? What do you think about it? Should we always synchronize it with the tempo of the exercises or of whatever we are playing?
Thanks, I appreciate. I wish you the best.
Andy
Hi Andy,
This is a really interesting question! I think that you could certainly use your breathing to influence the execution of the exercise and that it may help with keeping a steady tempo. I’ll have to give this a try as I’ve never thought of it!
Thank you for this thorough post. I found it really helpful to watch your video so I could see exactly the correct positioning you described in article. I know how important correct technique is in the long run. I also like how you explained the purpose of the exercise and how it is not just to create a nice plucking sound, but to train your left hand to move appropriately. I will be checking out your other posts now.
Hi Rebecca and thank you for your feedback; I am so glad that you have found this helpful! 🙂
Hi Marketa,
This is a great turtorial! I played violin for a short period of time in elementary school and have just returned to it recently after playing guitar for a long time. Having played both instruments I realize that the violin is a more difficult instrument, especially since it’s fretless. Keep up the good work!
Hi Frank,
You are so right about violin being more difficult! I can play the guitar (very poorly) but the frets are just so helpful to get you putting your fingers in the right spots. Do keep at it and let me know if you have any questions or particular areas you’d like me to address in a post or video!
Thanks for your comment
marketa ?